

Jenkins Agent to Master Node Connection Using SSH Keys | Deploying Project on Agent


Jenkins is a powerful tool for automating software builds, tests, and deployments. To ensure that your Jenkins environment is both secure and stable, it's important to connect your Jenkins agent to the master node using SSH keys.
This process may sound technical, but it's quite simple. In this blog, we'll walk you through the steps to connect a Jenkins agent to a master node within the same subnet instance, in a way that's easy for non-technical users to understand.
How Jenkins Master/Slave work?
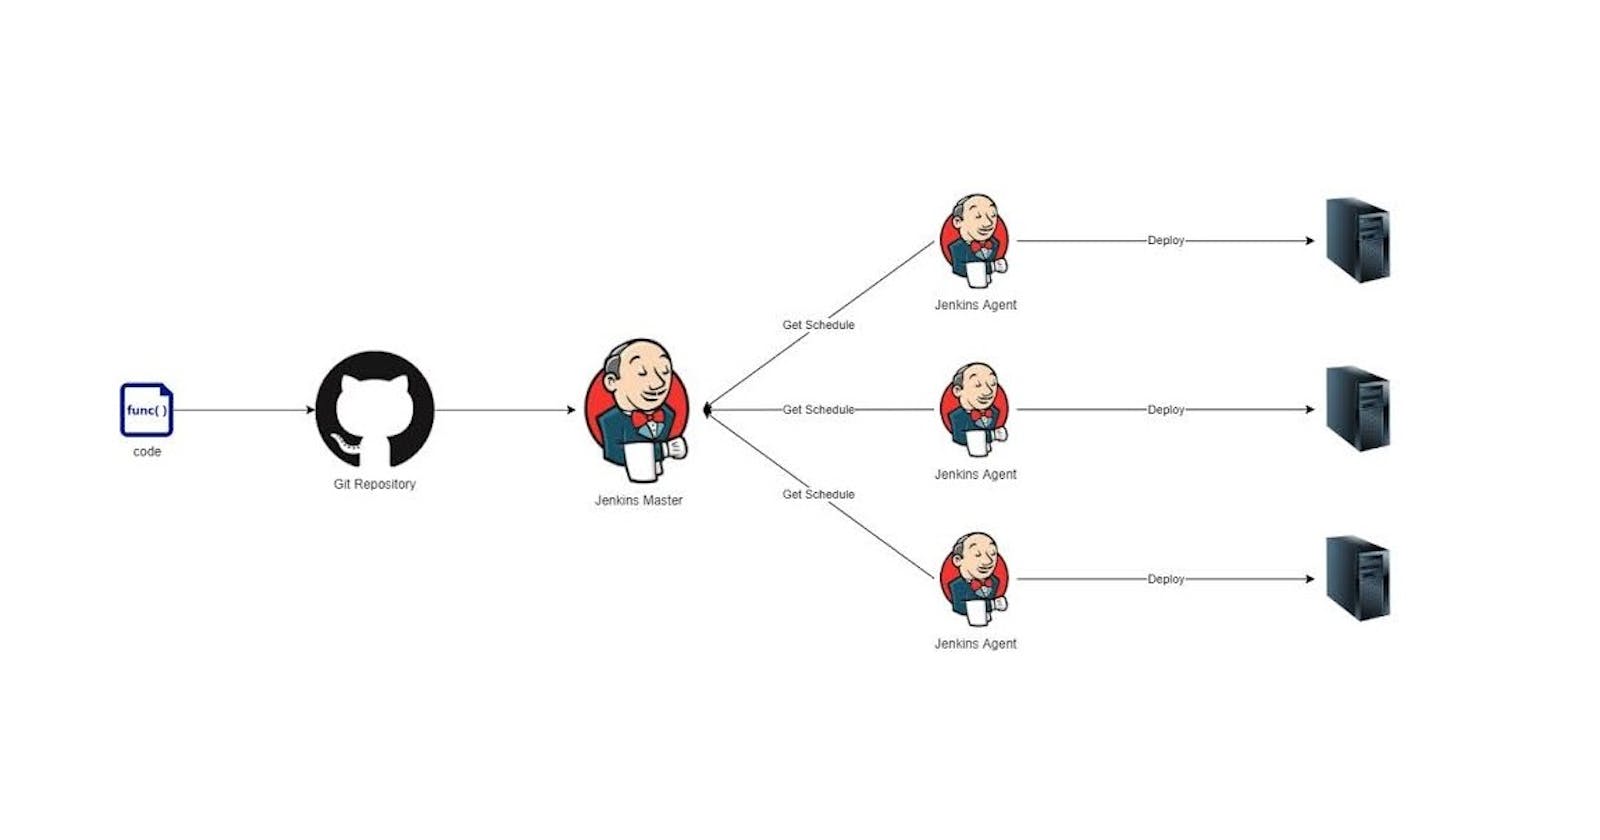
Jenkins master/slave architecture is used for distributed build environments, where the workload of building projects is distributed to multiple agent nodes, and we can use different environments for each build.
In the Jenkins 'master/slave' architecture, a master represents itself as a basic Jenkins installation and handles all tasks for the build system. The Jenkins master node will be used for scheduling jobs, monitoring slave nodes, dispatching builds to slave nodes, recording and representing the build result, and also executing build jobs directly.
The Jenkins slave nodes set up for offload build projects from the master, and it's required an established connection between the master and slaves. Jenkins slave nodes can run on a variety of operating systems like Windows and Linux, and there is no need to install full Jenkins packages on it.
In this tutorial, we will learn how to set up Jenkins master-slave architecture. If you don't know how to install Jenkins must visit this Blog
Prerequisites
Jenkins-master-server ( With Jenkins installed )
Jenkins-agent-server ( With java installed with the same version as master servers java).
What we will do?
Generate SSH Keys
Copy the Public Key to the Agent Node
Configure Jenkins Master Credentials
Configure the Jenkins Agent
Test the Connection
Deploying New Project on Agent
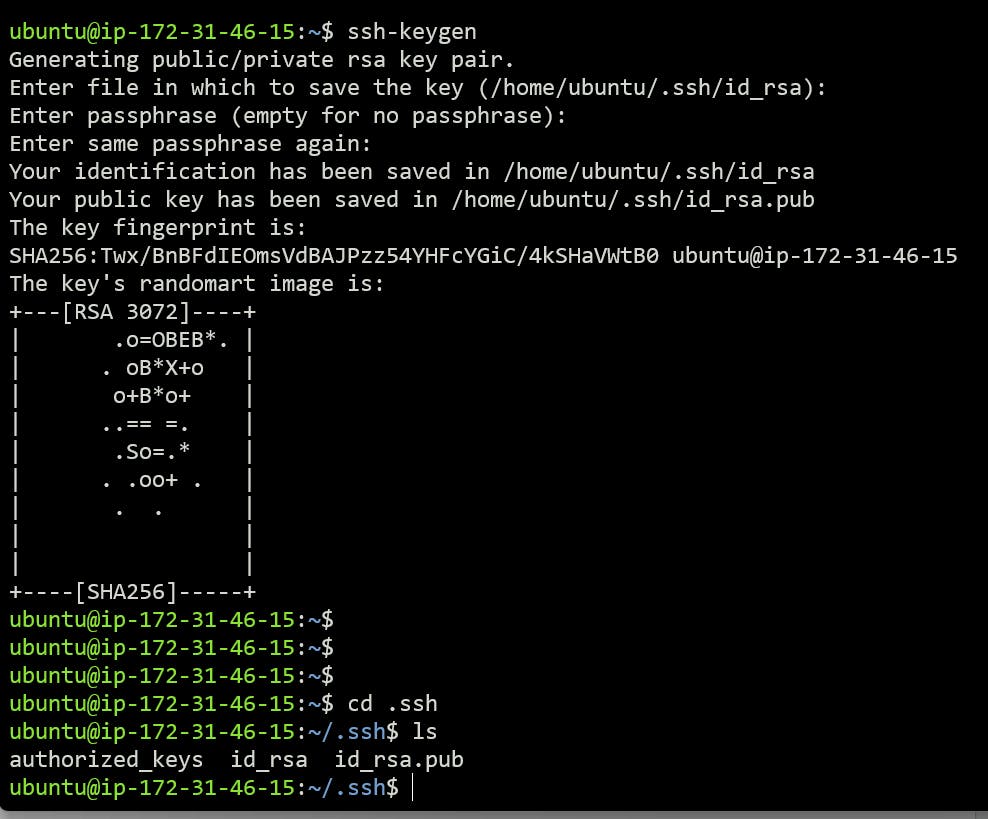
Step 1: Generate SSH Keys
The first step in connecting your Jenkins agent to the master node is to generate a pair of SSH keys in the Master Node. This is simply a set of two keys that will be used to secure the connection between the agent and the master node.
To generate your SSH keys, open up the terminal on your Master Node machine. Then, type the following command: ssh-keygen
You'll be prompted to select a location to save the key pair and to set a passphrase. For security reasons, it's recommended to set a passphrase, but if you're not sure what that is, you can just leave it blank.
Step 2: Copy the Public Key to the Agent Node
Once you've generated your SSH keys, the next step is to copy the public key to the agent node. This will allow the master node to securely recognize the agent.
To copy the public key, follow these steps:
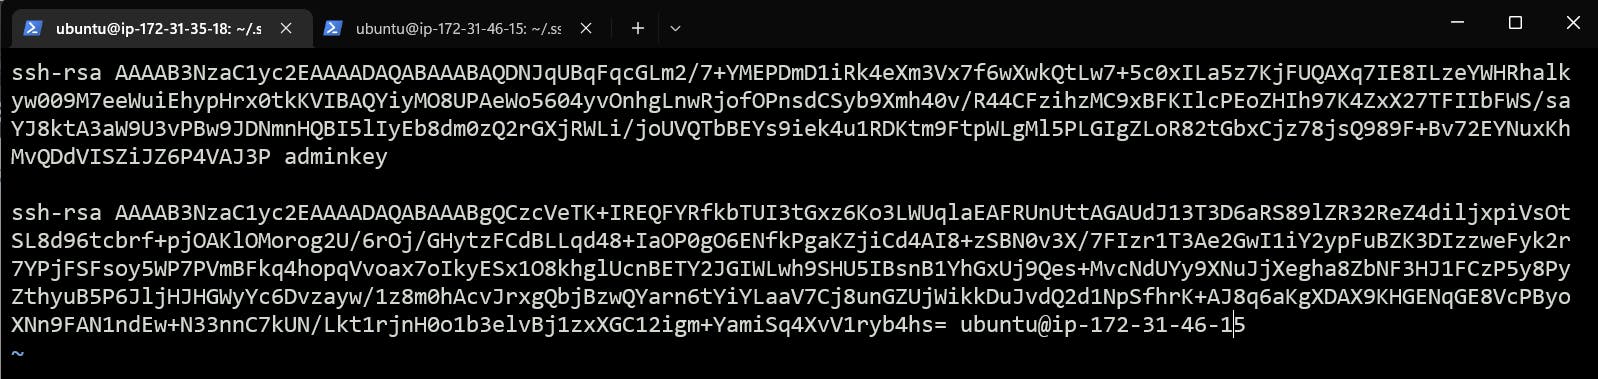
Open the public key file in a text editor. The file is typically located at
~/.ssh/id_rsa.pub.Select all the contents of the file, and copy it to your clipboard.
Connect to the agent node via ssh.
Open the file
~/.ssh/authorized_keyson the agent node. If the file doesn't exist, create it.Paste the contents of your clipboard into the
authorized_keysfile.Save the file, and close it.
Step 3: Configure Jenkins Master Credentials
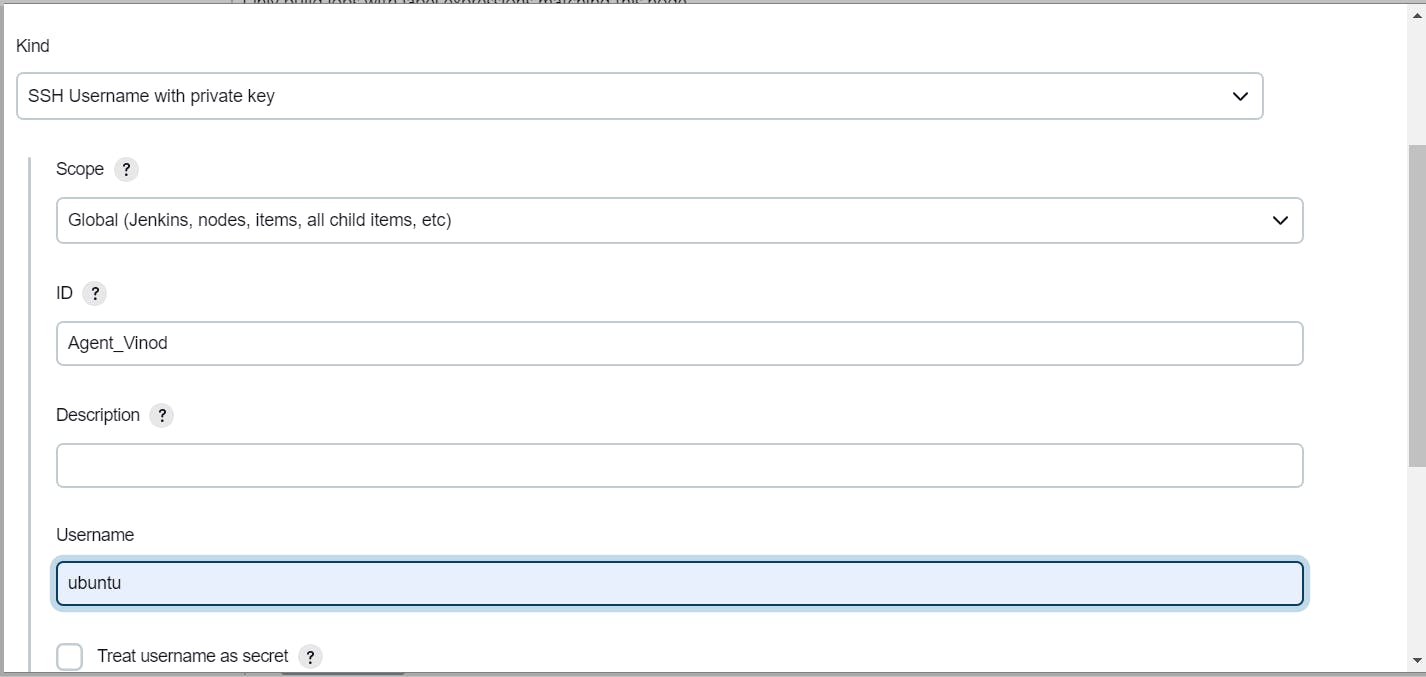
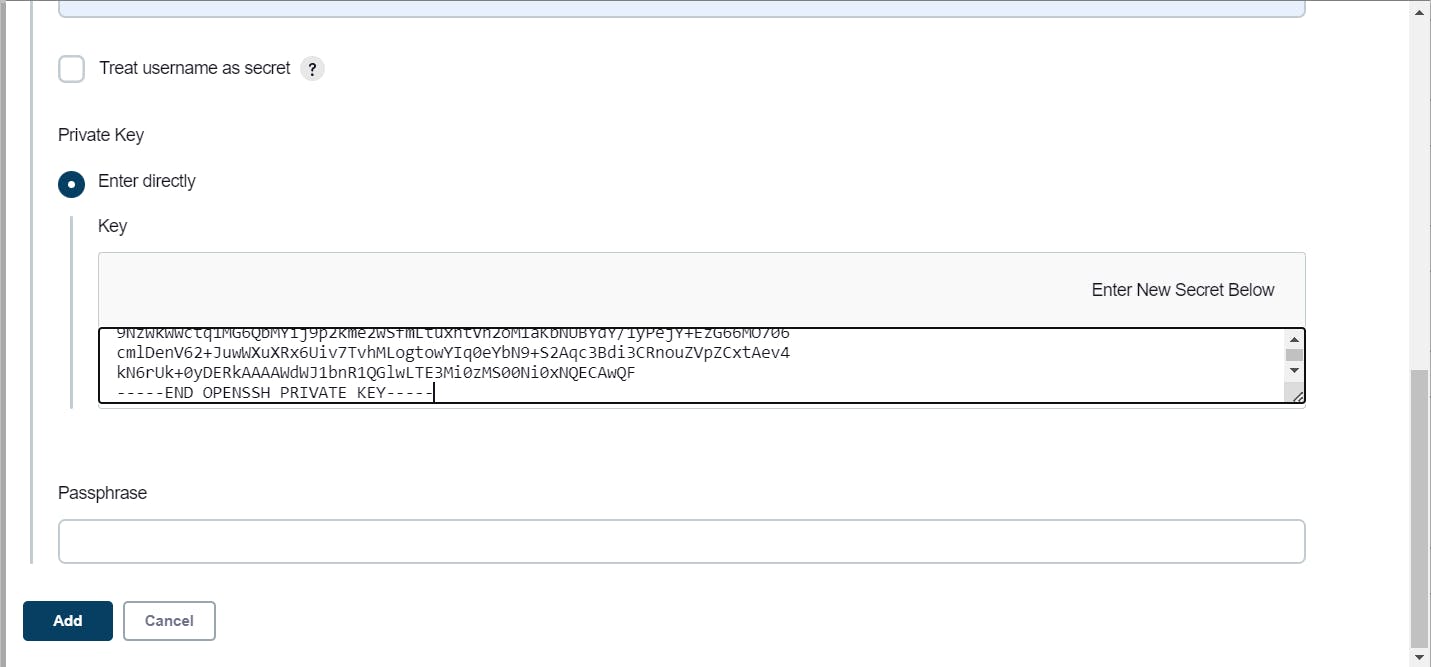
Go to Jenkins dashboard –> credentials –> Global credentials –> add credentials, select and enter all the credentials as shown below and click ok.
Kind: SSH Username with a private key
Scope: Global
Id: Agent-Vinod
Description: SSH-Keys_for_agent
Username: ubuntu
Private key: Enter directly and paste the ‘id_rsa’ private key from the master node server.
Step 4: Configure the Jenkins Agent
With the public key copied to the agent node & credential set for SSH, it's time to configure the Jenkins agent. Start by logging into the Jenkins user interface, and navigating to the "Manage Jenkins" section. Then, click on "Manage Nodes" and select "New Node" to configure.
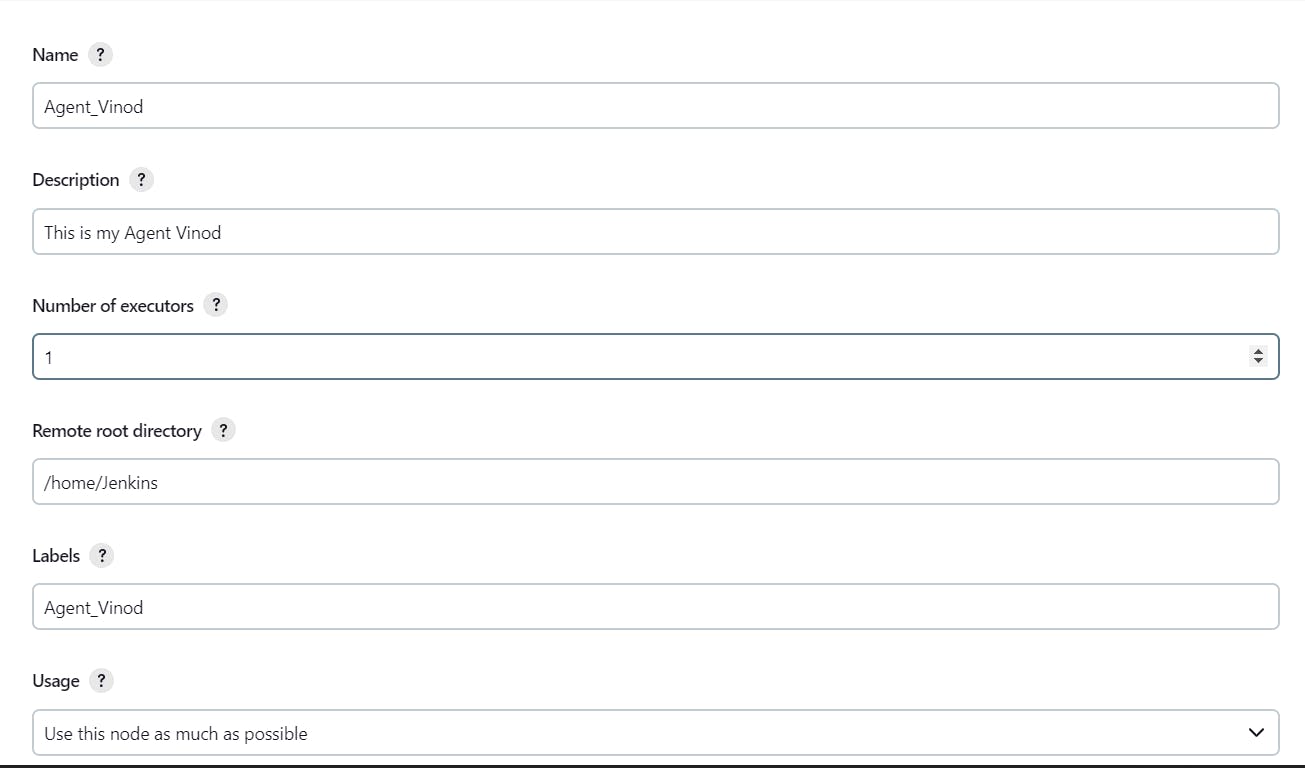
In the node configuration, select and enter all the credentials as shown below and click Save.
Name: Agent_vinod
Description: This is my Agent Vinod
Remote root directory: /home/ubuntu
Labels: Agent_vinod
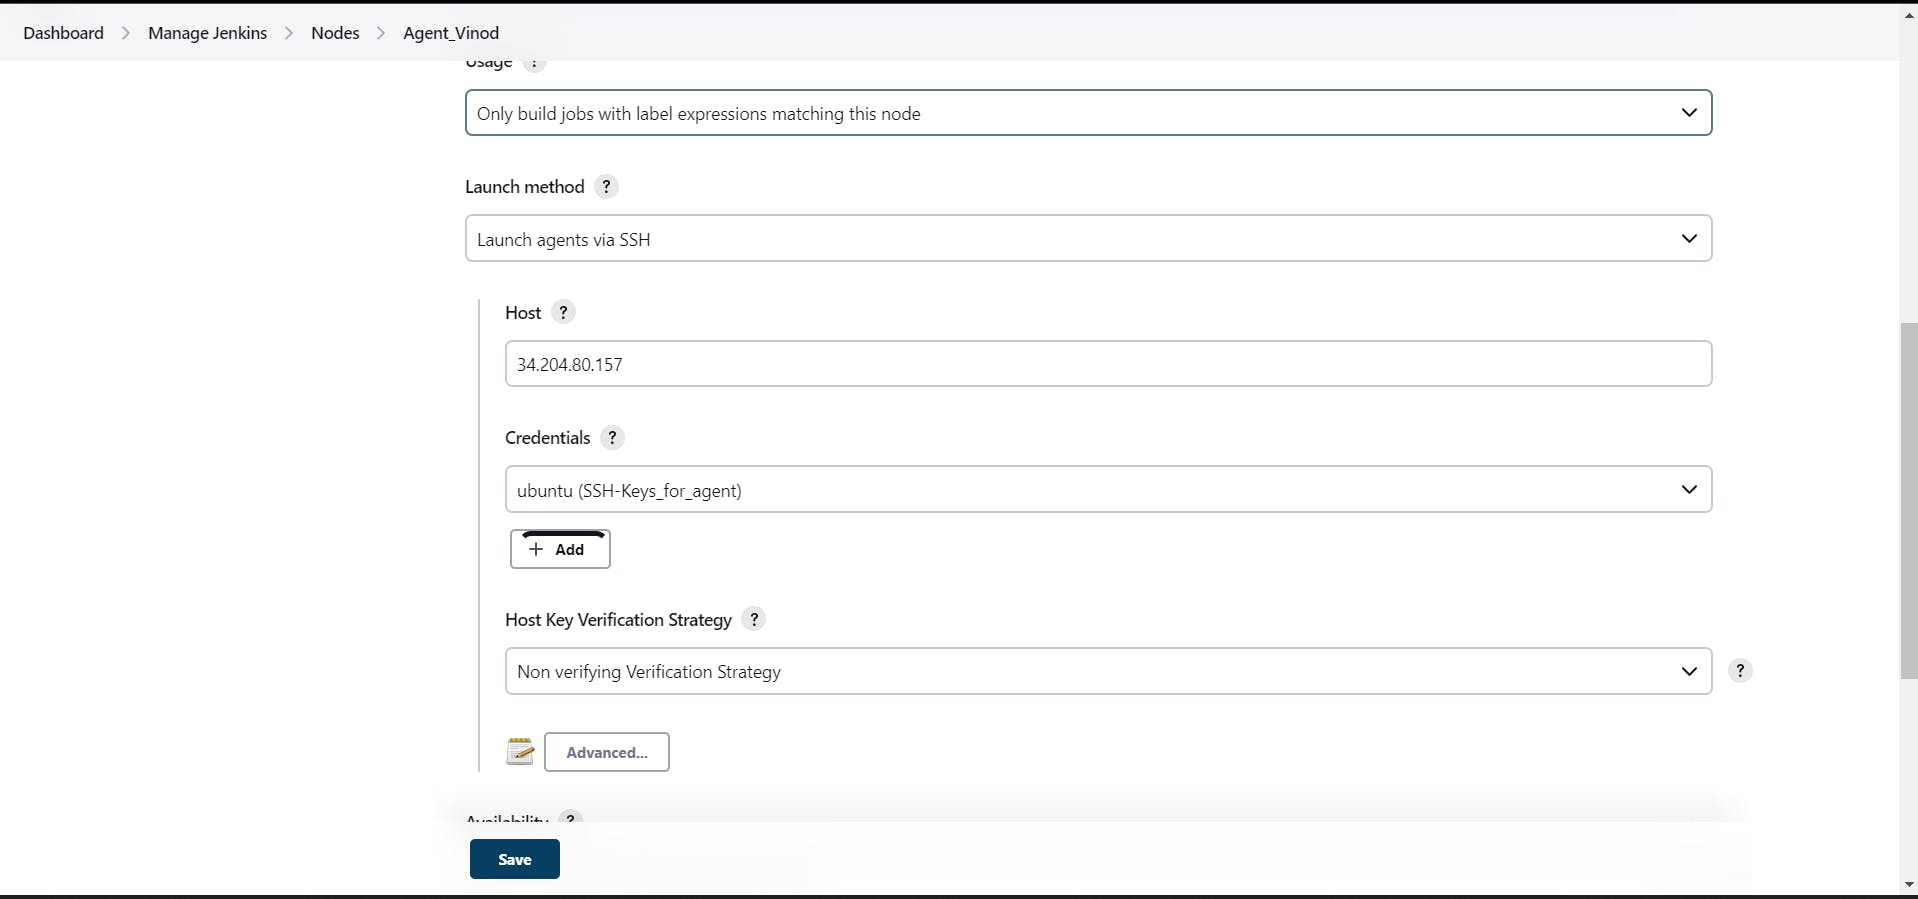
Launch method: Launch agents via SSH
Host: 34.204.80.157 [ It’s my Agent_vinod ( Agent node server ) public IP ]
Authentication: using ‘ubuntu’ credentials.
Host Key Verification Strategy: Non verifying Verification Strategy
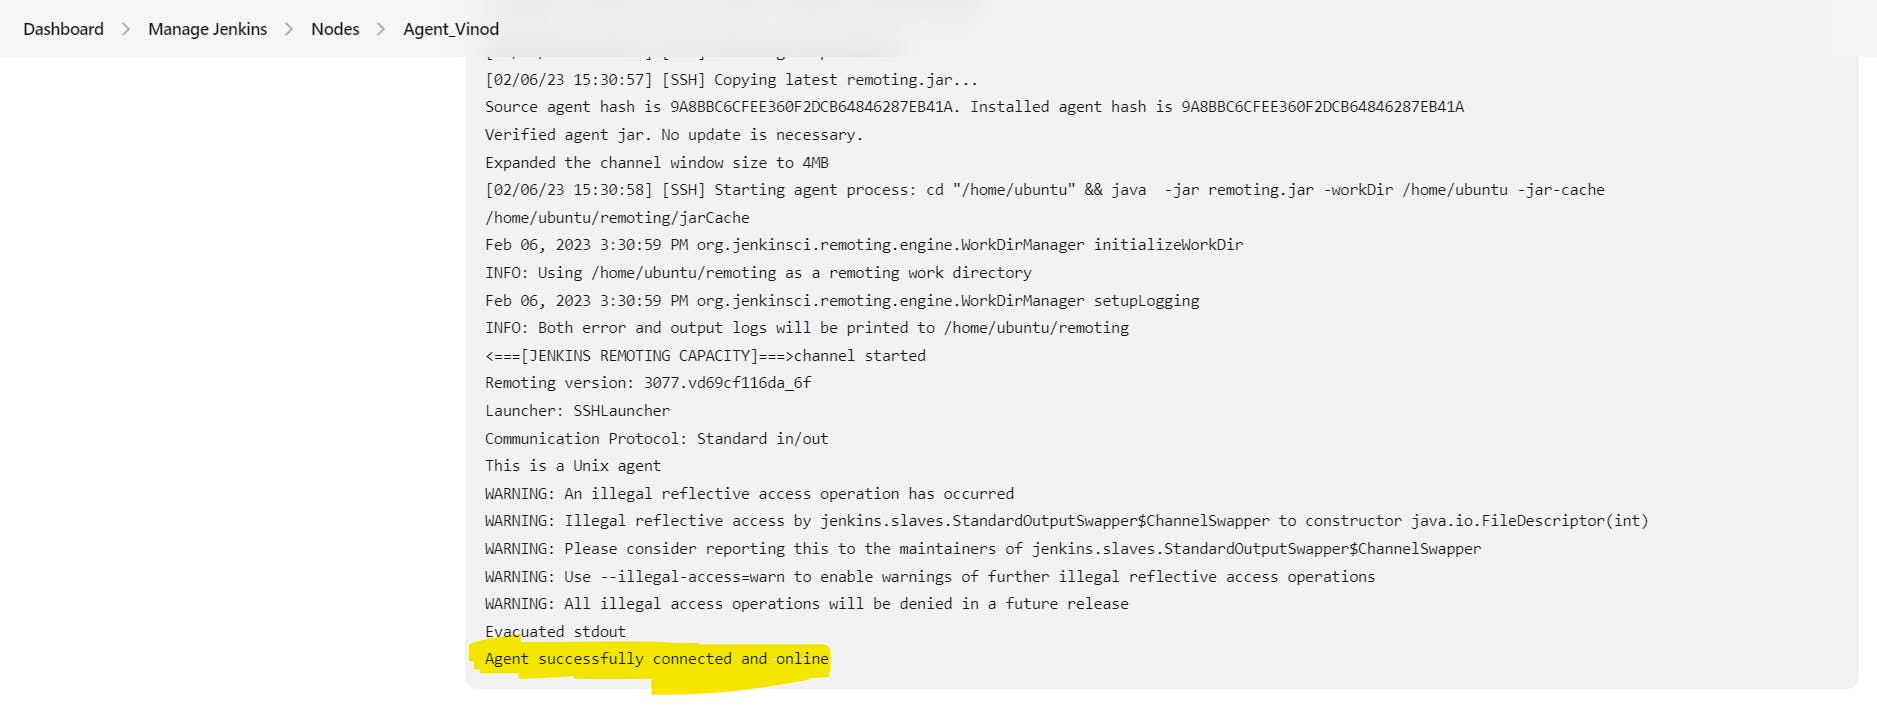
Step 5: Test the Connection
To make sure everything is set up correctly, you can test the connection between the agent and the master node. In the node configuration, click the "Log" button. If the connection is successful, you'll see a message saying "Agent successfully connected and online"
If the connection fails, make sure that the Inbound Group settings on both the master node and the agent are set up correctly, and that the SSH port is open on both.
Note: Now you can add as many agents as you want. you only need to perform Steps 2 & 4 From the above.

Projects for your Practice:
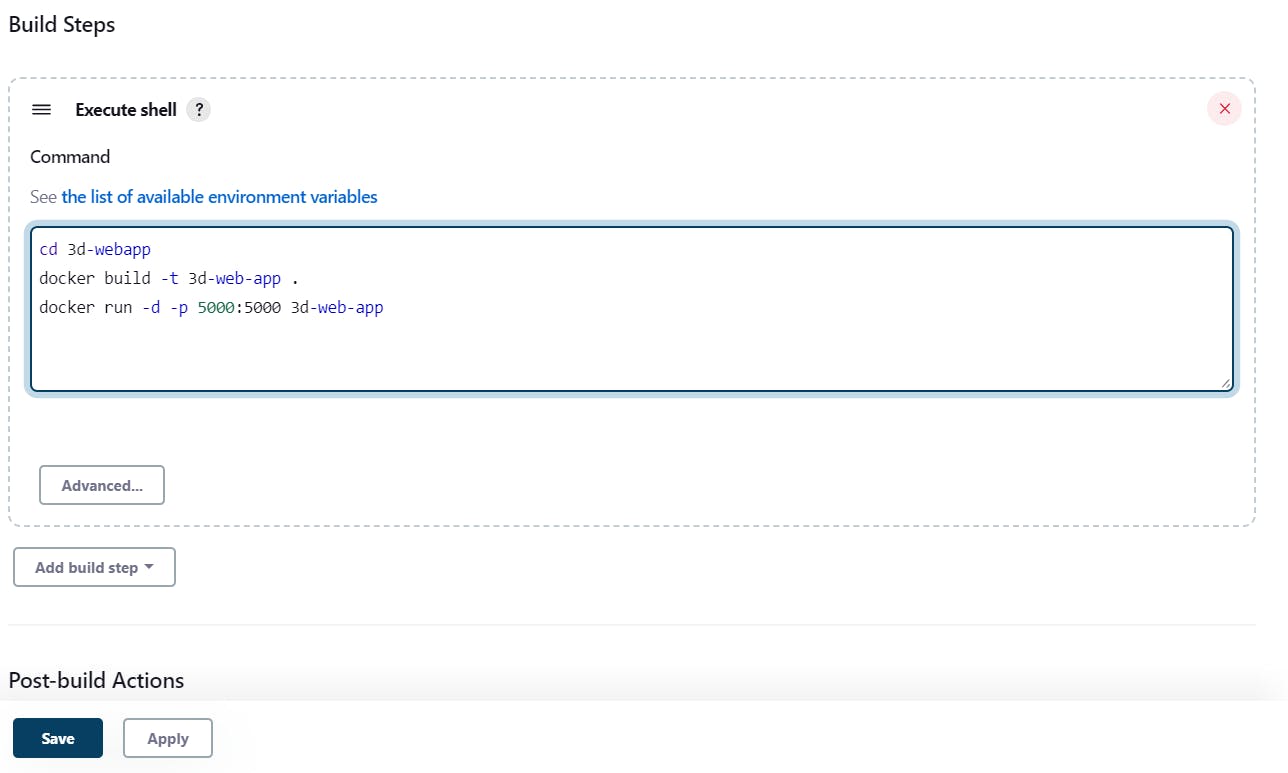
Project1: Let's Deploy Web-App via Jenkins on Agent 😃
- Note: This Project needs Docker so install Docker on Agent and have permission from the user.
Step 1: In the Jenkins dashboard, Click on the New Item.
Step 2: Enter the Name and Select FreeStyle Project.
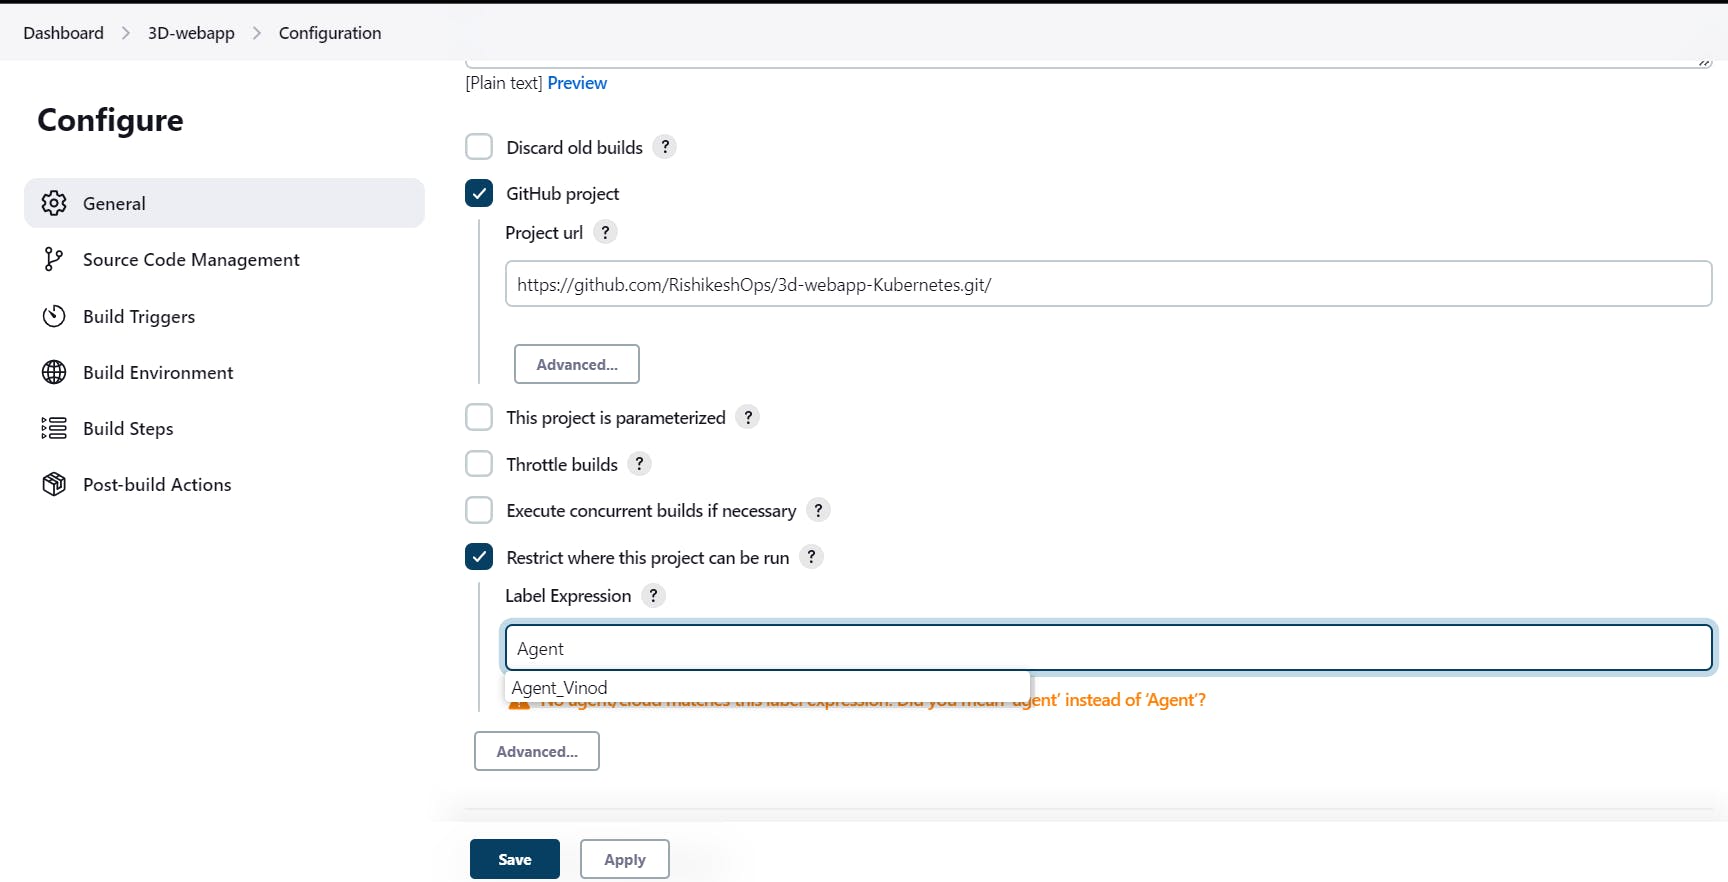
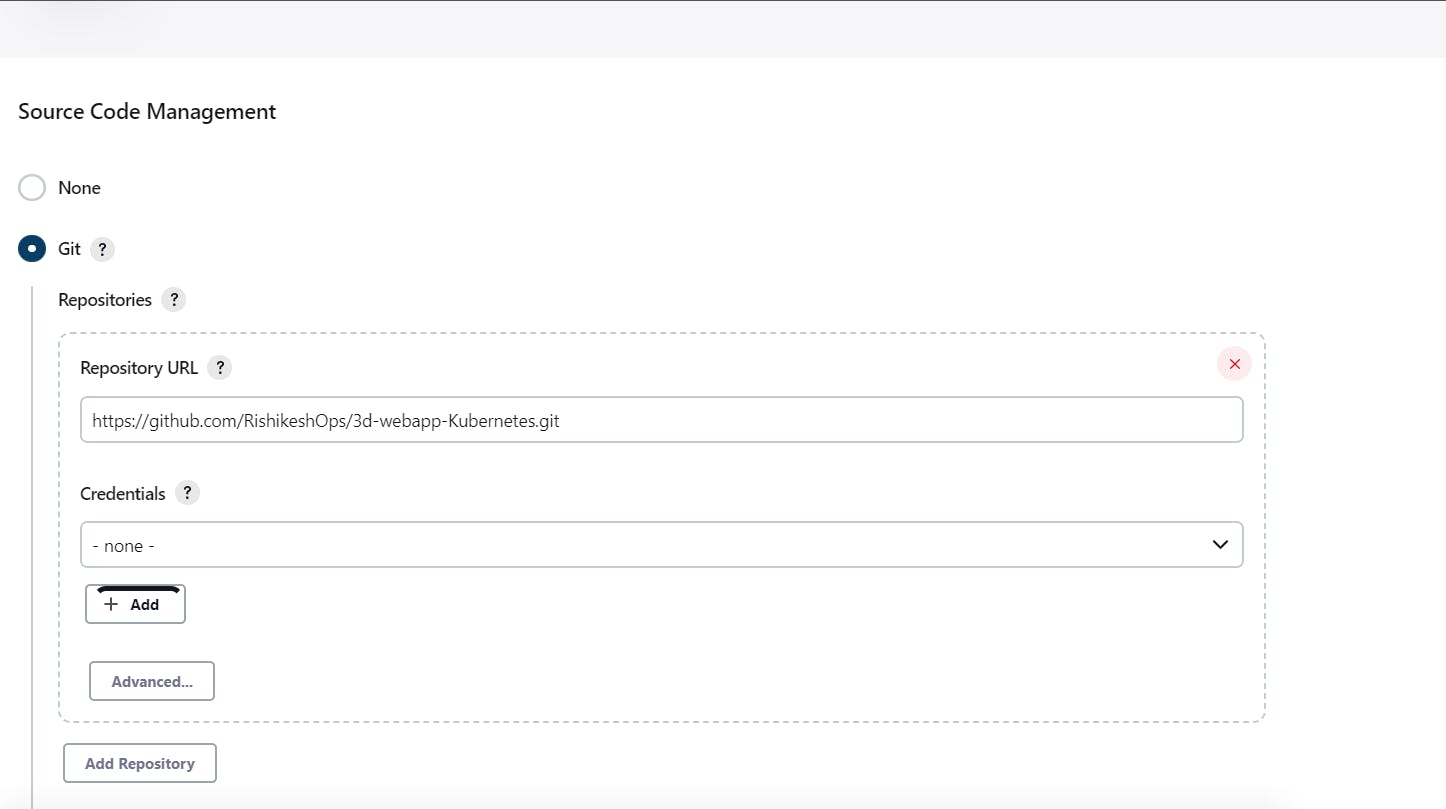
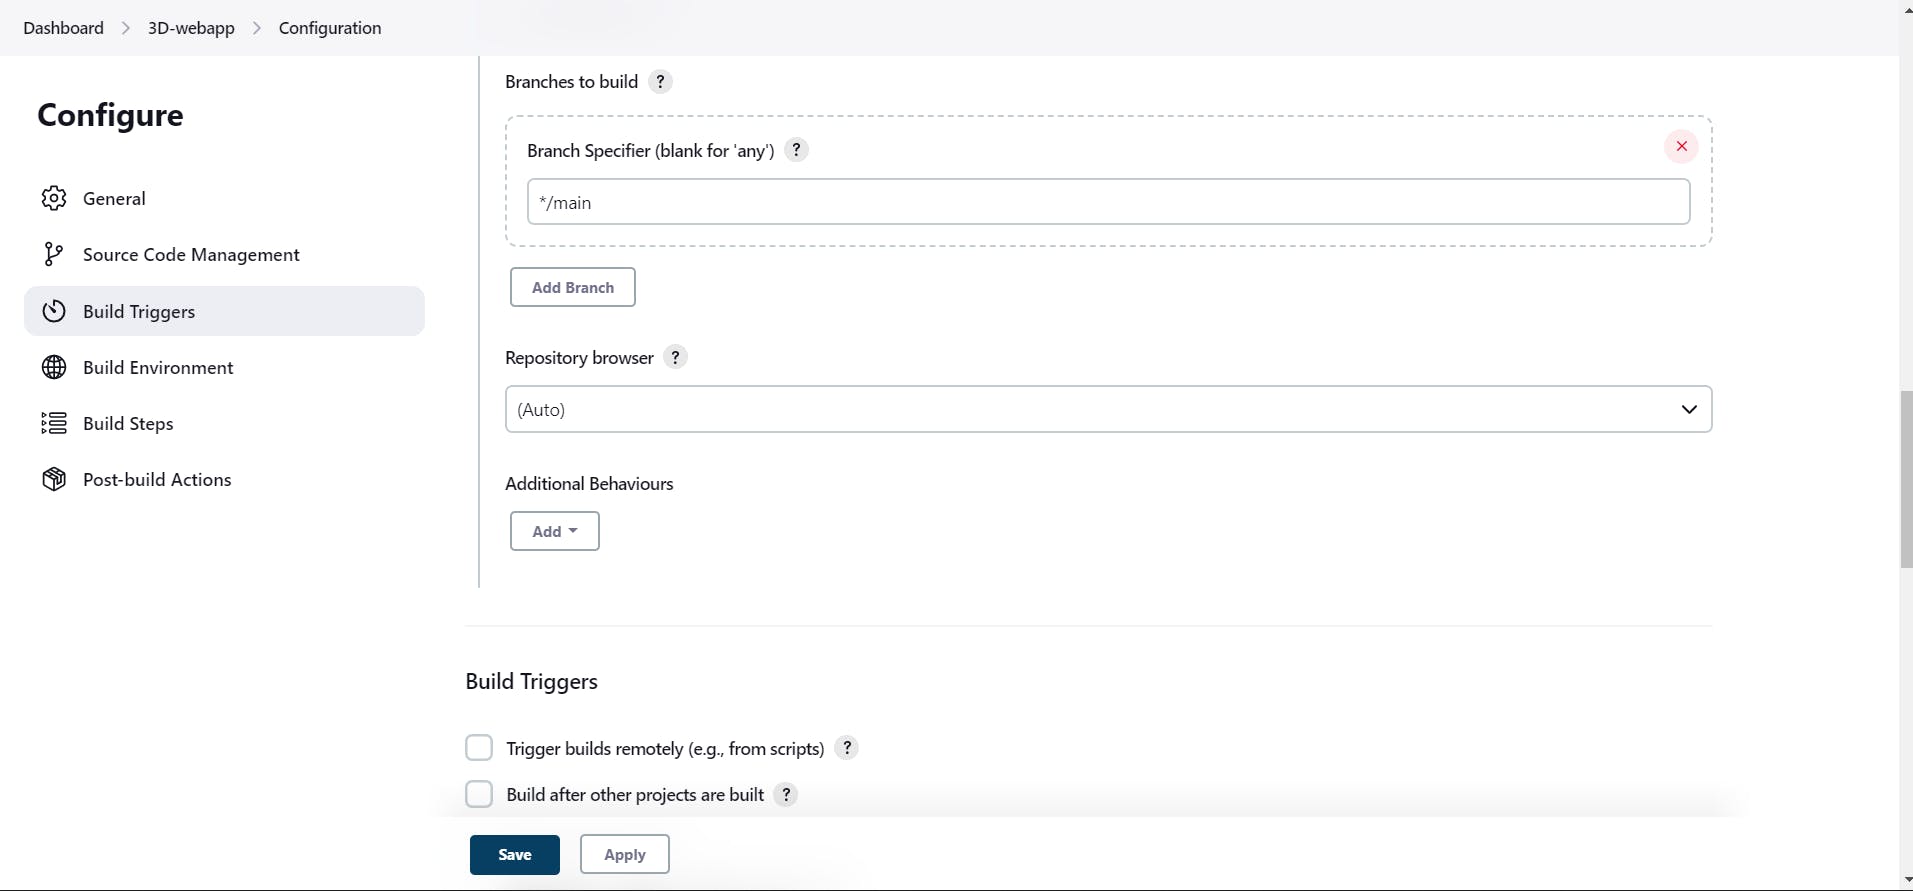
Step 3: You will reach a page where you have different options(like build, build triggers, and source code management) that help you manage your job. Provide a Description here, Provide the Git-Hub URL of the code and select Source code Management as Git & Paste the Repository URL of your project. Make sure you select Restrict where this project can be run and select the agent that you created now. And follow all the steps shown below and click Save.
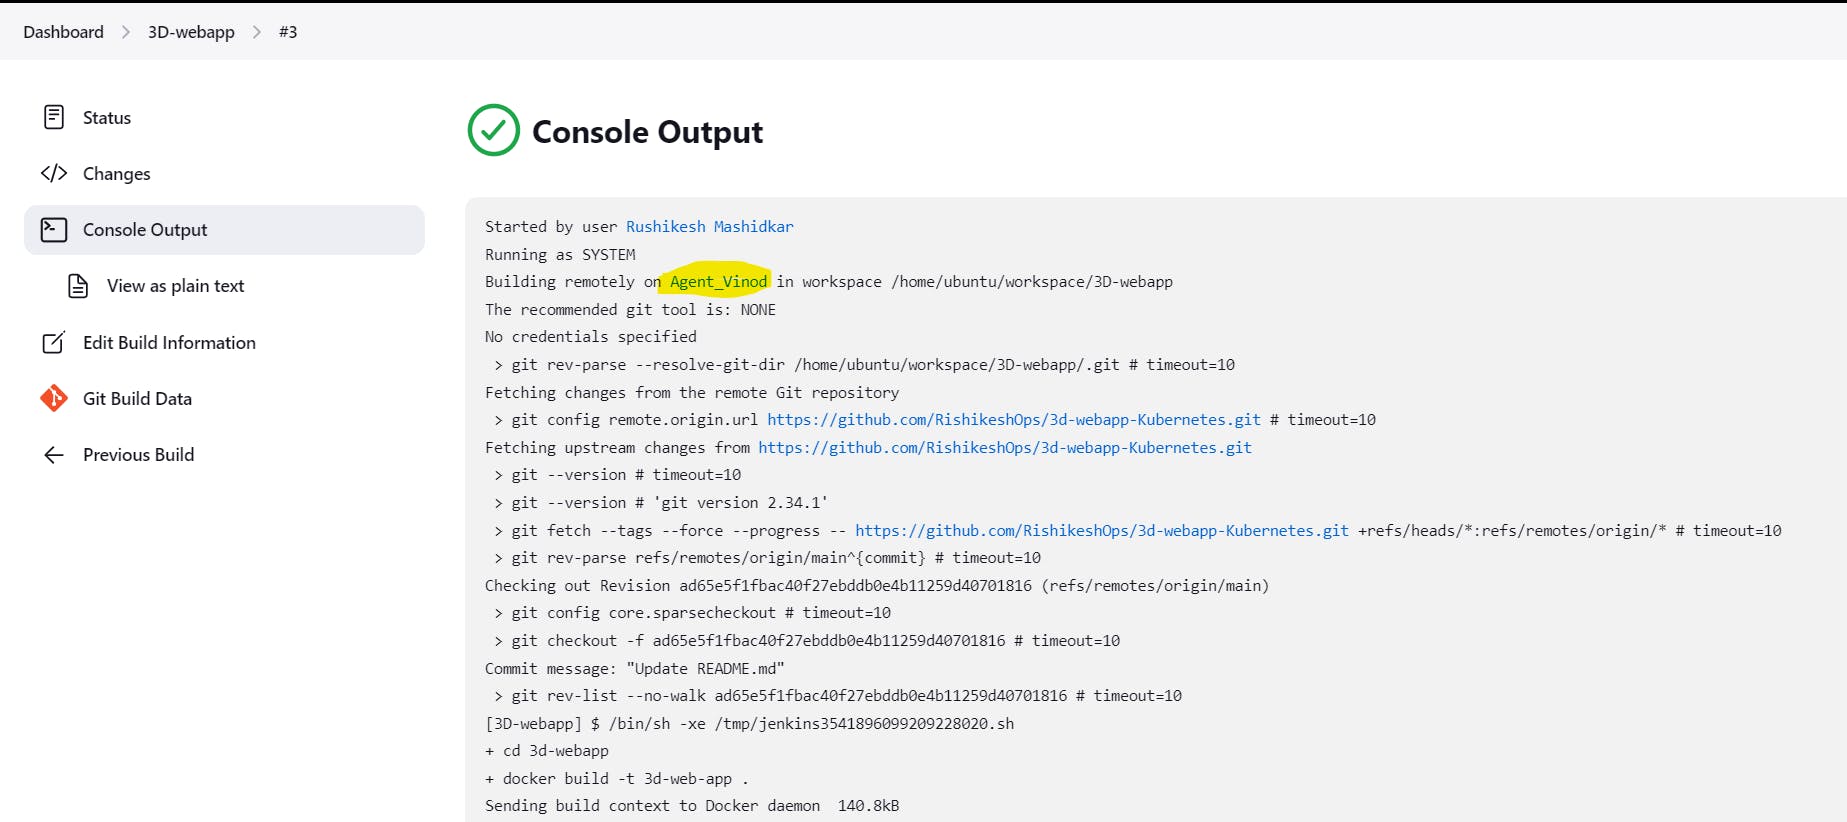
Congratulations🎊👏 You deployed a new project on a remote agent through the Jenkins master node.

Conclusion
By following these simple steps, you can easily connect a Jenkins agent to a master node using SSH keys. This will help to ensure the security and stability of your Jenkins environment so that your builds, tests, and deployments run smoothly.
Thanks For Reading! :)
- Rushikesh Mashidkar💕